


FP7100 Fantasea Underwater Housing


Fantasea FP7100 Camera Housing with Nikon Coolpix P7100
As you can see from the past Bajau Laut post I had a new toy to play with while I was on the island of Borneo. The Nikon P7100 in a FP7100 Fantasea Housing. I was a little skeptical about this set up going in. I had seen several videos and still images that looked almost too good to be true. For $700 from Adorama for the camera and the underwater housing was almost to good to pass up.
The camera is built solidly enough. It reminds me of the Canon G12. It has all the normal settings M, A, S, P, Movie and several custom settings. It has both an optical viewfinder as well as the 3″ LCD screen on the back. It shoots/records Still Images: JPEG, RAW, Movies: MPEG-4 AVC/H.264, MOV, Audio: AAC, WAV. The JPEG images were not impressive. They didn’t seem to have the digital information in the file that I get with the Fujifilm XPro 1. The highlights were often blown out and unrecoverable. However, the 10 MP Nikon RAW files were ok, at least for what I was needing. If I was shooting serious stock images, I might go another route. I never used any other mode underwater but program. There just didn’t seem to be any point as I never had the time to set up the shot and fiddle with exposure or depth of field. I’ll explain that more in a minute.
The housing, on the other hand, is impressive–very serious looking. They have managed to give the photographer access to every button and just about all the menu items on the camera. The housing comes with a flash defuser that works with the camera popup flash. I had serious doubts about the ability of the small popup flash, but it proved more useful than having none at all. Still, it would have been better to have had a larger separate speedlight, but we didn’t have the funds for that. I shot it mainly in macro mode and was pleased at how easy it was to focus. My biggest issue was I was snorkeling and not using scuba gear–so I was anything but neutrally buoyant. I found it very hard to get down to the bottom and stay long enough to find, frame, focus and shoot before my breathe ran out. The main reason was because I was fighting so hard at staying down. There wasn’t a lot of rock to hold onto, only reef, and holding onto coral is a big no-no for at least two reasons. First is you risk breaking off or damaging the coral. The whole point of this project was to photograph man’s interaction with the reef, which has not always been beneficial to the coral, and we were not wanting to be a part of that story. Secondly, many coral can be sharp and even poisonous to touch. Hanging onto coral is just a bad idea all the way around. I ended up adding two kilos of weight on a belt to help create some buoyancy. It helped, and my pictures got better as a result. But still, the best idea would have been to just rent scuba gear. Maybe next time. This is where experience is the best teacher. If I was able to do it over again, I would suggest we dive even in the shallows.
Let me pause here for a sec and say that I am not an experienced diver. In fact I am a pretty timid diver, but I have dived in some really remarkable places, like the Florida Keys in the 1980s, the Perhenthian Island off the east coast of Malaysia. I have snorkeled in places like Thailand and the Maldives and the Philippines, but nothing compares to what I saw in Sabah. The coral beds were thick and rich, and the water was as clear as I have ever seen. They said visibility was down; therefore, we could only see around 80 to 90 ft!
In all the ads and videos they say the housing is neutrally buoyant. I didn’t find that to be the case when snorkeling. If I let the camera go it would float up to the surface. I guess that is better than sinking. Had I been diving, perhaps the pressure under the water might have made the camera more neutrally buoyant. The FP7100 Fantasea Housing is made out of very hard plastic and seemed to hold up well. The O-ring seals were secure and tight. The clamp to lock the housing closed seemed very strong. It has a yellow locking pin on it that must be pushed to release the lock, so there is noway for it to open accidentally. The buttons were well placed and the few I used seemed to work as designed. There was a small rubber LCD shade that attached to the back. Half the time I would rip it off because my angle of view was always from slightly above and it would obstruct my view.
Overall the housing did what it was designed to do, keep the camera dry and to shoot clear high quality images. Not the highest quality, but that is more reflective of the camera, not the housing. Still in all I was impressed and can recommend this set up for a relatively easy way into underwater photography. As you can see from the images below.
Editors note: The Tun Sakaran Marine Park (TSMP) in Sabah, Malaysia on the island of Borneo is where the photos below were taken. A special thanks goes out to the Darwin Initiative that is working so hard at rebuilding the area’s reef and protecting the marine life. For an overview and a list of their objectives visit the Semporna Islands Darwin Project.
-
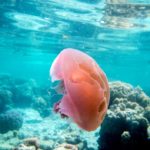
- f/2.8, 1/800 sec, at 6mm, 100 ISO, on a COOLPIX P7100

-
- f/2.8, 1/60 sec, at 6mm, 100 ISO, on a COOLPIX P7100

-
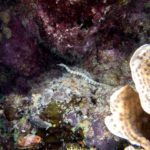
- f/2.8, 1/60 sec, at 6mm, 100 ISO, on a COOLPIX P7100

-
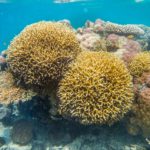
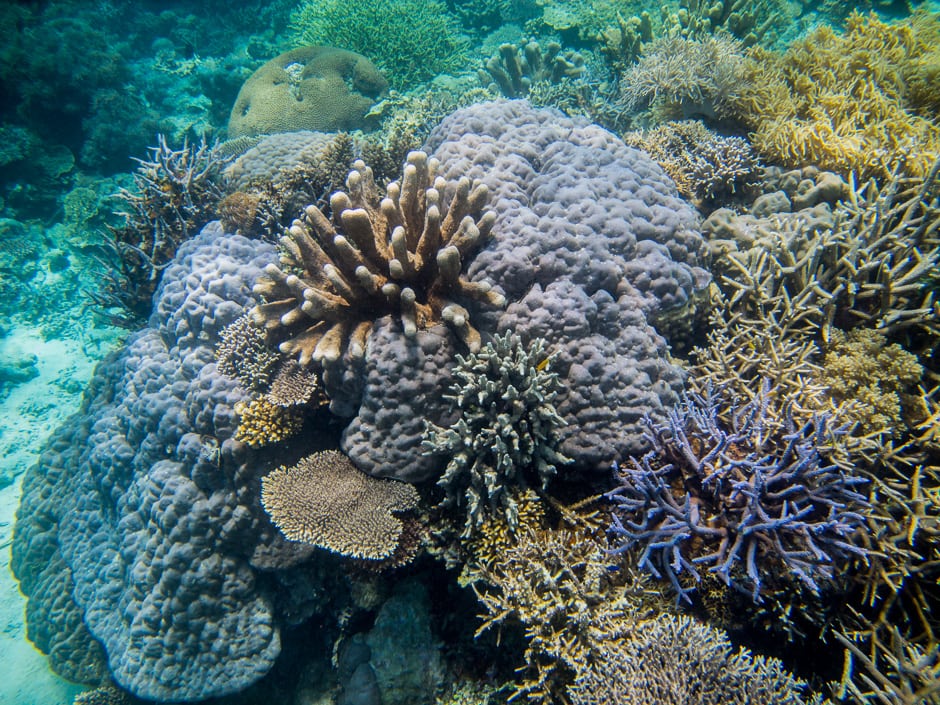
- A coral head

-

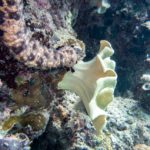
- f/2.8, 1/30 sec, at 6mm, 200 ISO, on a COOLPIX P7100

-
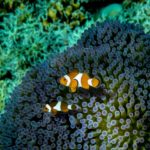
- f/3.5, 1/320 sec, at 11.8mm, 100 ISO, on a COOLPIX P7100

-
- f/2.8, 1/320 sec, at 6mm, 100 ISO, on a COOLPIX P7100

-
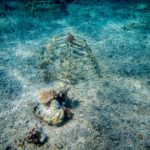
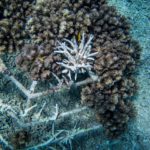
- Iron frames used to attach “seed” coral to start new growth after the reef was bombed.


